Does this sound familiar? I love to buy band tees but I hate the boys’ crew neck! It would look so much better if it were off-the shoulder, but I don’t want to have to replace the shirt because I cut the neckline too big the first time 🙁 No worries ladies! Luckily, this is an easy fix with the help of a little resourcefulness.
Supplies
-
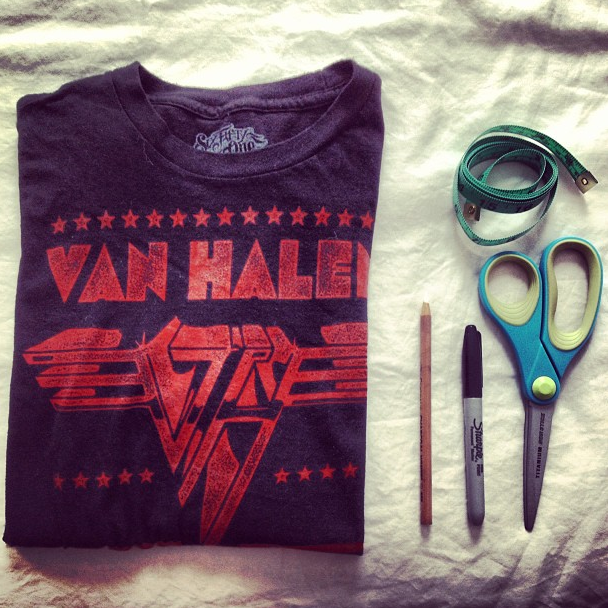
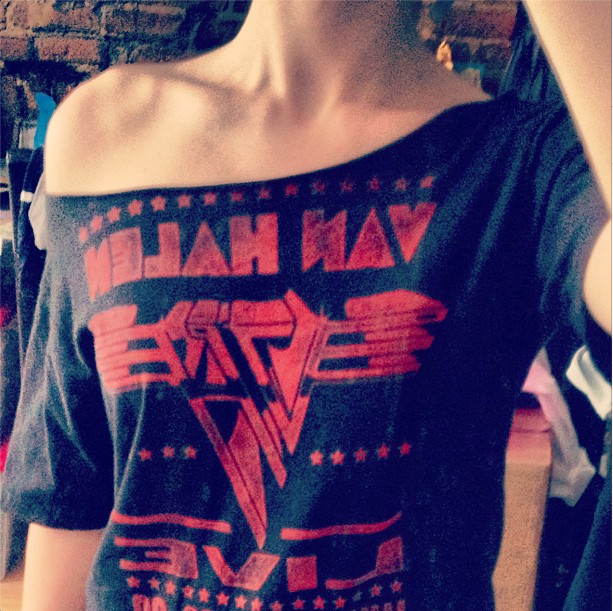
- ∞ Band tee in a regular/loose fit, i.e. My Van Halen shirt is a ladies’ Medium when I normally take an Extra Small/Small
- ∞ Either a white chalk pencil or black Sharpie (depending on color of shirt)
- ∞ Sharp scissors
- ∞ Measuring Tape
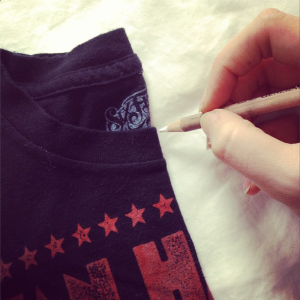
- 1. Fold your t-shirt in half by taking both sleeves to meet so that the logo or design on the front of the shirt is facing out and so that the shoulder seems match up. Take your pencil or Sharpie and mark the fold at the middle of the collar. The shirt must be symmetrical so that the mark is truly at the center.
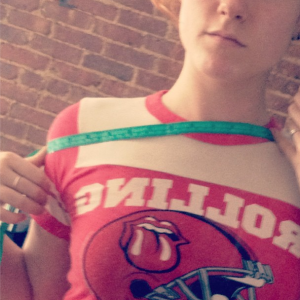
- 2. Take your measuring tape and measure from the base of your neck to just below the opposite shoulder. Take note of this number, but make sure to round down to the nearest number easily divisible by two. For example: My original measurement was 33cm so I rounded it down to 32cm because it was easier to divide in half. Take note of that final number for the next step.
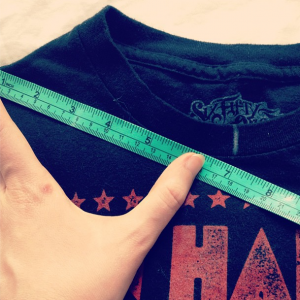
- 3. Lay your shirt flat. Taking that ^^ number, divide it in half. For me, I took 32 ÷ 2 = 16cm. Line up the measuring tape so that the tip is at the shoulder and the measurement (16cm) is aligned with your mark on the neck, ensuring that the side edge of the measuring tape is touching the outer hem of the shirt’s neckline.
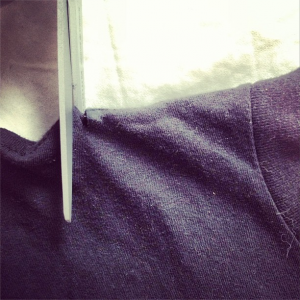
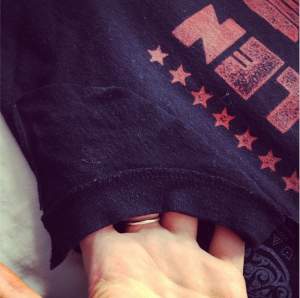
- 4. Make a small snip in the shoulder on the outside of your mark. Slip the bottom blade of your scissors through the hole so you’re only cutting the FRONT of the shirt.
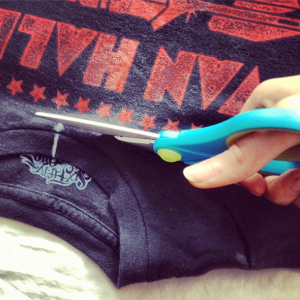
- 5. In a circular path, cut from that snip to the mark you made at the center of the neck.
- 6. MAKE SURE YOU ARE ONLY CUTTING THE TOP LAYER
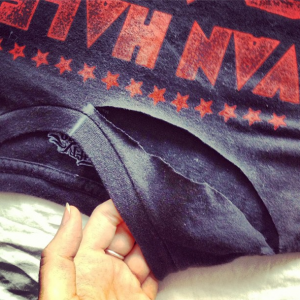
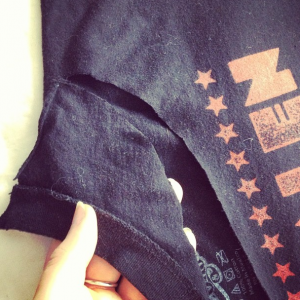
- 7. Cut along the shoulder seam to remove that side of the collar from the shirt.
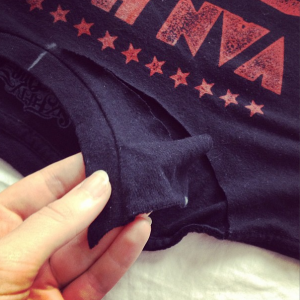
- 8. Fold over the flap that you’ve just created to use as a stencil for the other side of the collar to make sure that it’s even. Don’t worry about being too careful—a few jagged edges won’t be noticeable.
- 9. Again, cutting in a circular pattern (and following your “stencil”) cut the other side of the collar.
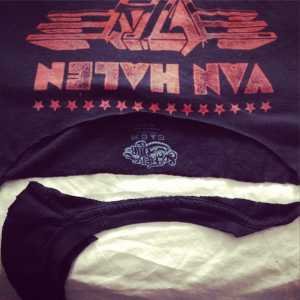
- 10. With the front of the shirt still attached at one shoulder, lay the shirt flat and bring the flap to one side to lay it flat.
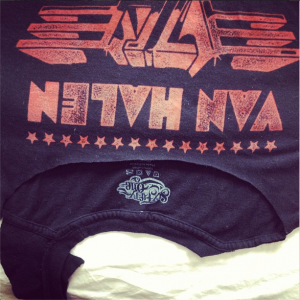
- 11. To ensure that your neckline won’t stretch out too much and reveal more than you’d like, cut the back of the neck straight across. DO NOT cut in a curve to match the front of your shirt. You will regret it.
Voilá!
NOTE: Though all photos were taken by me and are from my Instagram, I have to give credit where credit is due. The concept behind this magical mathematical genius is from YouTube-er Petite Pear Style. << Click on her name to see the video that inspired this post <<
Looking for a band tee to try this on?Check out some of my favorites below! |

37 comments
Hi Julia, I found this post via Pinterest. I have done two tee shirt refashions, using your instructions as a guideline. I have put links to your page in two places – hope that’s ok. They are http://artygreeninparadise.blogspot.co.nz/2015/11/it-worked-and-useful-refashion.html and No New Clothes For A Year Facebook group. Cheers, well done!
Hi Anne,
So happy this guide was useful for you! That’s perfectly fine, thank you for linking to my page 🙂 Let me know if there are any other DIY guides that you’d like to see as well.
It’s sad not to see any comments on this page because it explains THE EXACT REASON MY SHIRTS DONT LAY CORRECTLY AFTER I CUT THEM!!!! Thank you!!!
Thank you, Caitlin 🙂
Just did this and turned my ok t-shirt into my favorite t-shirt. Thank you! And agree with the other comment, you explain why it needs to be cut the way it does.
Tash, I’m so happy to hear this method worked for you!! If there are any other DIY ideas you’d like me to feature, I’m always open to suggestions 🙂
Do you have a v-neck version of this? I have one with a really awesome design and I don’t want to mess it up.
Great instructions! My Duran Duran tshirt came out perfect for this weekend’s concert…and looks much cuter than when it arrived 😉
Girllllll…..
I hate t-shirts but will buy them to support artists I like. Thanks to YOU, I was able to take a t-shirt I bought 2 years ago and have only worn twice and turn it into one of the most awesome pieces of clothing I have in my wardrobe. THANK YOU!
April
Thank you so much for these instructions. I just made one and it is amazing!
Thank you so much for the instructions. I just made my first one and it is amazing!
I love the Tshirts you have on in all these pics-AWESOME!!
Just had to say
Fantastic tutorial!
Exactly what I’ve been looking for, will be doing it in about 20minutes!
Thank you for sharing
If I want it to be a shirt that is off both my shoulders, would I need to do anything differently?
Hey, I don’t know if you know the answer to this, but I’ll ask anyway: I have a tee shirt band too, except the collar is not the problem but the sleeves. The sleeves felt weird and tight, so I (thinking I have good cutting skills, which I now know I don’t) cut the sleeves off, it turned out wrong, so I re-cut the little snippets again. It looked good, except one problem. The problem is it now has these little strings from the seam of the shoulder sleeve to shirt, that are annoy for me have to like cut off again and again from it. Is there any way for me to remove the strings from the seam or do I have to sew it or what? Sorry for the long explanation . Hope it makes sense! Thanks!
I haven’t even tried this yet but I’m thanking you in advance! I’ve always wanted to cut some shirts into OTS shirts but was scared I’d screw it up. Thanks again for this!
Thanks for postng.i love off the shoulder shirts diy. The next part will sound rude and It is but anyway I am 11 year old girl. My gandparents are very… overprotective and religious. They think it is inappropriate for me to wear skinny leggings. They lecture me about everything (not kidding). So im going to wear this shirt over to their place to see their reaction. Thanks for postng.
Thanks
Best DIY Tutorial ever!!! Can’t tell you how many shirts I’ve ruined trying other ways. You explained this perfectly, and it resulted in a perfect neckline on my Tshirt. TFS!!!
Will this method work on a tighter fitting Tee, or for tighter fitting Tees should one use the “cut both sides in a circle method”?
Will this method work on a tighter fitting Tee, or for tighter fitting Tees should one use the “cut both sides in a circle method”?
Thank yhou
Hi. Thanks for this. What I really need to know was how to finish it off. I’ve done a lot a tees this way over the years but finishing is always very sloppy. Any ideas?
This was so helpful! Just tried it on my first shirt and love it. I love tees but always feel strangled. Now I can wear them comfortably and look cute. Thank you!!!
amazing – worked perfectly thank you.. loving my 80s revived Bowie shirt! 😉
THANK YOU!!! It finally worked! Now I can wear T-shirts and not feeling uncomfortable. I have ruined so many tees. Thanks for sharing!
Thanks in advance.
Thanks , im a fashion designer, I love to learn more.
Thanks
Im so glad i found this! Makes my project a lot easier to make
You are amazing! Thanks for the tutorial!!!
Thank you for this! Best tutorial I’ve seen on how to do this !
Is there a way to salvage a shirt with a too deeply cut collar, and circular cut in the back? I read this post after it was too late!
I think it is meant to look raw at the neck, some people stretch it a bit to have the edges roll. you can also cut the hem of the sleeves off and the bottom of the large shirt to a more flattering length and pull to roll those hems too.
I found this page on Pinterest and I just wanna let you know what a game changer this is. Every time I wanna cut another shirt like this I look your page back up. I’ve been using it for at least a year. Thank you so much!
great content you have here.